

Over the past decade, digital imaging technology has become widespread: most cameras now sold in North America and Europe are digital rather than film based. Digital photography has become an easy, inexpensive and rapid way to capture clinical images.1 Medical fields such as dermatology, radiology and ophthalmology2 have been using digital imaging for some time, but family doctors are also well positioned to take advantage of these evolving imaging trends.3 Digital photography can help physicians provide better medical care by adding accurate, easy-to-capture clinical images directly to electronic records (replacing inaccurate or inadequate clinical descriptors or stylized pen and ink sketches in our notes). The growth and evolution of lesions and wounds can also be monitored. In addition, this format allows images to be shared through telemedicine services4 or for images to be sent (through intranet or the internet) quickly and efficiently from one health care level to another for consultations with colleagues or for teaching5 and research.
We aim to briefly summarize the approaches that we have found useful for introducing digital photography into the family physician's practice.
No caption available.
Items required for getting started
A digital camera: see below for advice on choosing the one that is right for your practice
A personal computer: A Windows or Macintosh computer with sufficient processor speed (e.g., 2 GHz) and random access memory (RAM; e.g., 512 Mb) is required for viewing and storing images. Imaging software is often bundled with the purchase of the camera. Storage devices, such as a hard drive (with > 50 Gb of memory) and a CD-ROM burner, allow you to store and archive older images.
Memory cards: Keeping a spare memory card on hand will allow you to quickly store more photos without downloading images from a full card onto your computer.
Cables or memory card reader: Cables connect the camera to your computer, whereas a card reader allows a direct connection of the camera's memory card to your computer without needing to connect the camera.
Consent: Capture images only after obtaining consent. Written consent must also be obtained if the images are to be used for publication or research.
Choosing a camera
Although technology is always being updated, we have divided digital cameras into 3 groups based on image quality (megapixels [Mp]):
1. Basic models: these cameras have resolutions of less than 4 Mp. They are easy to use and are recommended for novices.
2. Advanced models: these cameras have resolutions of between 4 and 8 Mp and have features such as automatic focus, macro focus and zoom with approximation adjustments. Some are digital single-lens reflex (dSLR) models and have interchangeable lenses.
3. Professional models: currently there are digital single-lens reflex models with resolutions of up to 12 Mp.
In general, we recommend the use of an advanced or professional model to obtain high-quality digital images in the doctor's office. Generally speaking, these cameras cost upwards of Can $300 [Price adjusted to 2006 dollars].
Tips for improving the quality of your images
Size marker: If the size or shape of a lesion or injury is important, include a size marker (such as a ruler). This will allow for comparison of the injury over time.
Minimize unnecessary elements: In general, we find that minimizing unnecessary details in the image is best. However, it is sometimes useful to show anatomical landmarks, for the purpose of localizing the lesion in the picture (if multiple lesions are being captured).
Identification: If an image will not be immediately added to a patient's file, it is necessary to include identifying detail (such as the patient's initials or ID number) to a peripheral aspect of the printed photograph.
Lighting: Setting aperture-priority allows the camera to automatically adjust the shutter speed to obtain the appropriate lighting conditions. Depending on the camera, the sensor sensitivity can be modified, together with the lighting conditions and use of flash for improving the lighting of the subject.
Macro format: The use of this format allows high-quality close-up images to be obtained, particularly of dermatologic features (Fig. 1).

Fig. 1: Image of a dermatologic lesion obtained by macro format.
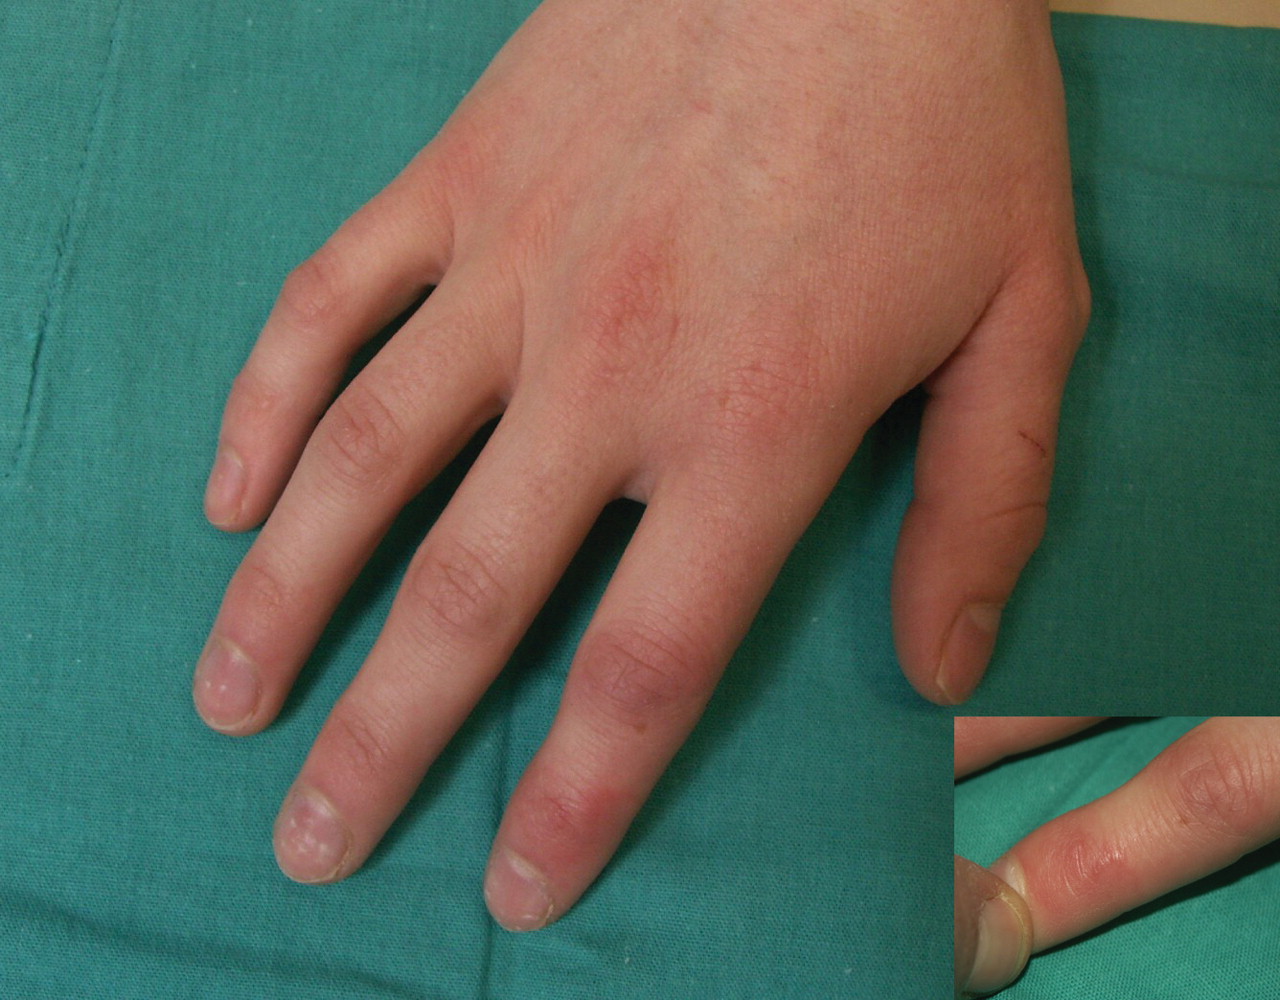
Take 2 images: Until you are comfortable with clinical photography, we would advise taking 2 images (Fig. 2): one from a distance showing the location of the injury and its relation to the surrounding area, and another showing the injury or lesion in detail. We recommend holding the camera so that the plane of the camera is parallel to the plane of the object being photographed, maximizing the depth of field.

Fig. 2: Two different images of a single lesion.
Use backdrops: The use of a matte backdrop can help to minimize distractions in the image. We suggest using a backdrop that is medium light green (such as a surgical drape), black or blue.
Special considerations
Certain situations provide for a greater challenge when capturing digital images in the clinic:
Photographing dark skin: A common error when photographing individuals with dark skin is to overexpose the image. To correct this, it is necessary to close the aperture by 1 or 2 increments (f-stops).
Mouth shots: When taking a photograph of the inside of the mouth, it is important to have good lighting conditions and to focus carefully. To do this, an external light source (a lamp) or a ring flash coupled to the lens can be used. However, ring flashes do not produce a shadow, which gives a less textured image.
Standardized photographs: To compare images obtained at different times, it is important that the images are taken in the same way: using the same camera, lens, lighting conditions, distance and angle. Recording all of this can be a challenge in a busy general practice and is not always possible without dedicated specific equipment; however, standardization allows for a direct comparison between photographs of lesions taken at different times.
Ophthalmology: In ophthalmology it is often useful to take photographs of the retina (Fig. 3). A digital retina camera can be mounted on a similar support to a slit lamp.
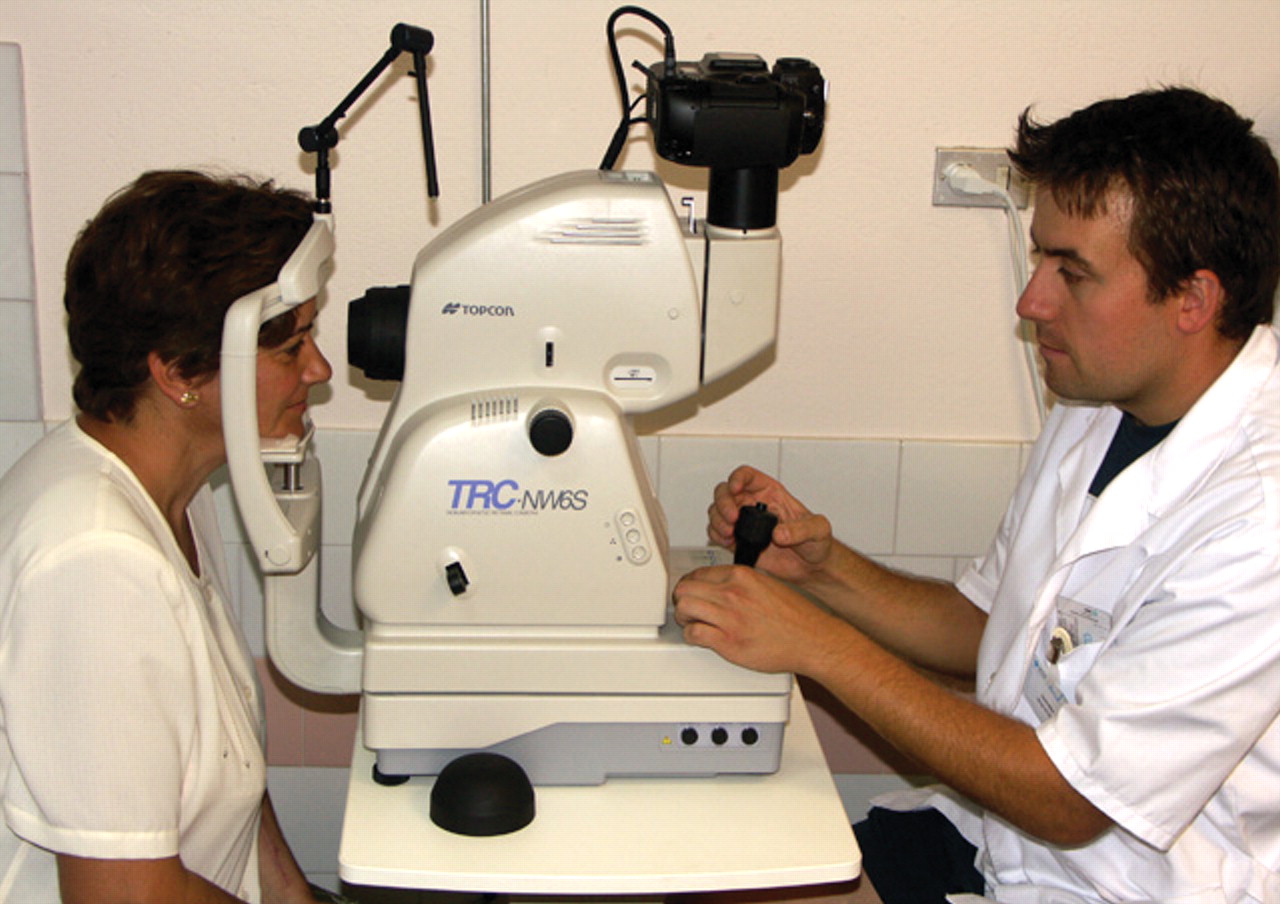
Fig. 3: Obtaining an image of the retina using a digital retina camera.
Photographing radiographs: Although radiographic images can now be captured digitally, film radiographs mounted on a light box can also be photographed. Generally, it is wise to keep the camera's aperture as open as possible, to use macro format and to avoid the use of the flash (Fig. 4).
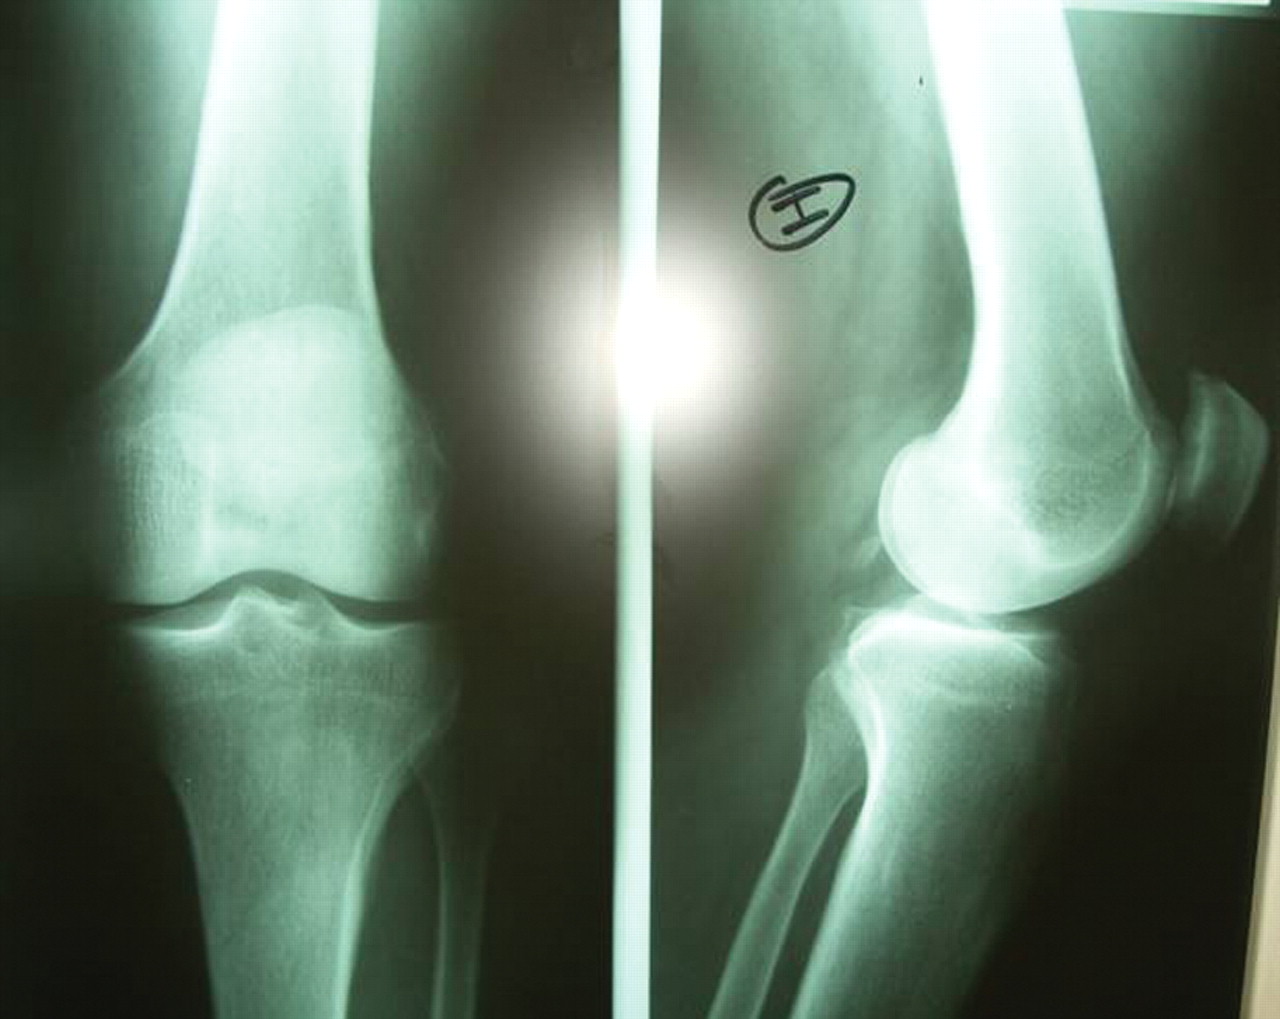
Fig. 4: Photograph of a radiograph showing reflected flash at the time of taking the photograph.
Viewing and processing images
The quality of an image can be immediately assessed by the clinician, and a new image can be taken if it is inadequate. The angles, lighting and point of focus can be varied to allow different points of view, incorporation of additional clinical details and the recording of changes in the colour of lesions. Early and immediate storage in the patient's medical record is wise, so that the images are not accidentally misfiled at a later date.
Because accuracy is essential for clinical images, we generally do not recommend manipulation of the image (with the exception of perhaps removing unnecessary identifying details if the images are to be shared externally, with the patient's consent).
Conclusions
Digital photography has become commonplace in health care and complements the advent of electronic medical record keeping. The ability to capture high-quality digital photographs is an important skill for generalists to develop. Unlike film photography, digital photography allows practitioners infinite experimentation to hone their skills before implementing the system in their practice. Advances in digital photography have made it possible to study the possibility of creating new programs such as teleassistance, teledermatology, teleradiology and teleophthalmology.
Footnotes
-
This article has been peer reviewed.
Acknowledgements: The authors thank Anna Rodríguez-Rosich and Cristina Florensa Roca for their review and assistance in the preparation of the manuscript.
Competing interests: None declared.
In this issue

Article tools


Jump to section
Related Articles
Cited By...
- No citing articles found.
More in this TOC Section
Similar Articles